Tuesday, July 31, 2012

Two Year Old Photo Shoot

Back in the Spring I won a drawing for a couple of free prints from a local photographer at a consignment sale, so we gave her a try at Easter for baby chicken pictures.  We LOVED her work and how well she worked with Nicholas.  He is HARD to get just the right shot of because he is so busy, but she tries so hard and definitely earns her money working with Nicholas! Ha!  Anyway, we went to visit her at her studio last Saturday and I picked up my order plus a disc of all of his pictures this afternoon and I AM IN LOVE!  They are even better in person than they were on the online proofing page!  Here are my favorites:

 My mom got this one for her house in a large canvas and it is gorgeous!  I'm wishing I had done the same!  
I got this one in an 11x14 and it is precious!  I'm trying to decide where to hang it now???


 These next two are HILARIOUS and totally capture his fun personality!  I've framed them in red frames for his bedroom.


Monday, July 30, 2012

Meal Planning Monday

This week I struggled coming up with just the right meals.  I ended up going with a few staples and a favorite from another blog.

Sunday - Grilled Salmon, baked potatoes, asparagus
Monday - Bowtie Fiesta Pasta from Erin's blog at Blueeyedbride.com
Tuesday - Crockpot Ranch Chicken, Rice, Brocolli and Carrots
Wednesday - Meatloaf Minis (posted here 2 weeks ago), Pinto Beans, Mashed Potatoes
Thursday - Individual Chicken Pot Pies
Friday - Pizza Night

Crockpot Ranch Chicken (adapted from a Pinterest recipe found here)
4 Frozen Chicken Breasts
1 pkg dry ranch dressing mix
1-10oz can cream of chicken soup
Place frozen chicken breasts at the bottom of the crockpot, cover with dressing mix and pour soup over them.  I pour 1 1/2 empty soup cans of water over it to keep it moist, then place on the crockpot.  Turn it on low and set the timer on the crockpot for 6-8 hours (depending on how fast your crockpot cooks). Serve with mashed potatoes or rice with veggies!  A sure hit at our house with both the big and little boy!

Individual Chicken Pot Pies (adapted from my recipe here and this Pinterest find)
1 can of 10 Jumbo Biscuits
1 10 oz can of chicken
1 can of mixed veggies
any additional veggies you want to include
1 can cream of chicken

Salt and Pepper to taste

Cook any raw veggies until they are tender (or if you use canned you can skip this step).  Mix all ingredients and pour into biscuits that have been pressed into a muffin tin.  Cook at the temperature on the biscuit can (mine was 375) for 20 minutes and Voila!  Quick and easy way to feed your picky kids veggies!


Sunday, July 29, 2012

Sunday Funday In iPhone Pictures

We had a Sunday Funday for sure today!  We have been wanting to take Nicholas down to the north shore of the TN River to play for the past year, but just haven't ever got there.  After we got up and got ready this morning we decided to go eat at a cute pizza place at the park and go to the splash park!  Needless to say, someone LOVED IT!
Nicholas had only been to one splashpark before and that was almost a year ago when we went to Destin and there was one at our resort.  He loves water and this was perfect for him!  I die at the cuteness of him playing in the fountains.
After we FINALLY pulled him out of the water, we changed him into some dry clothes in the back of the car (obviously while still parked) and walked back to the area where we had lunch and ate some ice cream at Clumpies.  
I get kind of sad when I see how big he has gotten.  I can't believe he sat on a stool and ate every last bite of his ice cream with a spoon without any help or without getting any on his clothes.  Where did my baby go?!
We came home after that and he fell asleep right before we got home.  I just can't believe how big and grown up he is.  He will be 25 months old Wednesday and that just doesn't seem possible to me!  He has been in his new classroom for 4 weeks and we can tell a HUGE difference in him.  He is speaking in complete sentences, talking a lot more clearly, and showing interest in the potty.  I can only imagine what he will be like after he has been in there 6 months!  

Twitter/Blogger Girls Night Out


Over the past four years since I have been on twitter and blogging, I've made so many good friends!  I know a lot of people don't understand and make fun of me for my "online friends", but to me they are so much more than that.  They are the girls that understand my daily struggles, the first to support me when I'm down, and the first to be excited for me when something exciting happens.  Several of these girls have become close friends and I'm so thankful for that!  I've got friends all over the country and it is awesome when I get to spend some time with them.

Last night I went to dinner with Courtney and Ashley, who both live in Chattanooga, but have become friends through social media, and Lauren, who lives in Florida, but was in town to visit!  We went to one of my favorite places in town, The Boathouse.  They have amazing margaritas (although poor Lauren got a margarita on the rocks and it was more like a mini-rita) and seafood.  Seriously, it is the most fabulous atmosphere of sitting right on the river and eating tasty seafood!
I HAD to have the grilled oysters!  They are so good, but I'm wishing I had gone with 6 raw and 6 grilled.  I always love getting the oysters when I go there.
I forgot my camera at home, but this was the best we got on my phone.  I love these girls and I'm so glad we were all able to get together for an evening!  Can't wait to do it again soon!

Zoo Trip

We have a small, but nice zoo in Chattanooga that we have been to a couple of times, but lately Nicholas has become OBSESSED with animals and animal sounds.  For his birthday my parents gave him a membership to the zoo and we took him for the first time last weekend.  HE LOVED IT!

 My big boy was so excited to go!  He was fascinated with all the animals and just stared at them.
As soon as he would see one of his favorites he would point and yell what they are and what sound they make.  Here he is saying "MONKEY! EEEEEEE!"

When we saw the jaguars he kept whispering "meow".  I just busted out laughing.  Not quite buddy! 
 The "pirate birds".  We are also obsessed with pirates these days.
 I didn't know for sure what he would think about the petting zoo, but he liked the animals, but we had to make him touch them.  He wasn't so sure about that!
Nicholas loved the zoo and has talked about the animals all week.  He even pointed to the zoo and said "MONKEY!" when we drove by on the way to work and school Monday!  I am sure we will be back several times over the next year.  I'm already getting excited to for Boo at the Zoo and Holiday Lights (which we went to last year and saw Santa with Tate!).

Tuesday, July 17, 2012

Balloon Wreath Tutorial

 I had a ton of twitter, FB, email, and blog questions about my balloon wreath, so I thought I would post a tutorial blog post.  Y'all, this was by far the easiest, quickest craft I did for the party!  I saw the original idea here, but tweaked it a little to make it easier for me.  Here is how I did it:

I used the following supplies:
- 4 packs of 72, 12" balloons from Factory Card Outlet in blue, yellow, black, and red
- 1 Styrofoam wreath, which I spray-painted black to match my door
- 1 package of floral pins
- 1 small Mickey Mouse

I got all of my supplies out on the rug and spread out the balloons (obviously this was done after bedtime for the toddler).  I arranged them into groups of 4 randomly every time and then put a pin around them like this...

I just filled the front of the balloon, then the side, and done!  It literally only took me about 45 minutes!  Quick, easy, and very cute!
When the wreath was finished, I used the pins to secure Mickey to the center of the bottom part of the wreath and he stayed until I unpinned him to give to N.  It was a huge hit and everyone commented on it.  Hope this helps to explain how I made it, if not, feel free to comment and I'll try to answer your question.

Sunday, July 15, 2012

Meal Planning For The Week

I have been super slacking on my premade dinners, but due to some changes in Michael's schedule, I've got to get back on it.  It's hard finding time with N running around in full toddler mode, but I can usually get 2-3 hours of naptime out of him on Sunday afternoons.  This week I am making chicken spaghetti and meatloaf minis (made in a muffin tin).  We will be having leftovers one night and easy black bean quesadillas another.  Also to note for those of you looking for toddler ideas, Nicholas eats all of this well along with applesauce or yogurt with every meal and he also drinks milk with meals.


Here is our schedule this week:
Sunday: Michael smoked BBQ for a cookout with friends
Monday: BBQ sandwiches and chips
Tuesday: Chicken Spaghetti
Wednesday: Meatloaf Minis, Mashed Potatoes, and Crockpot Pinto Beans
Thursday: Black Bean Quesadillas
Friday: Pizza Night (N's favorite!)


Chicken Spaghetti (I've posted this before, but it has been awhile, so I'm reposting some good ones)
3 chicken breast, cooked and shredded
8oz cooked spaghetti (drained)
1-10oz cream of chicken soup
1-10oz Rotel
8oz Cheddar Cheese


Cook chicken, spaghetti, set to the side.  In a medium saucepan, mix cream of chicken, rotel, and cheese (slowly add cheese while stirring).  Heat until mixed well and melted together.  Add chicken and mix well.  I use a foil casserole dish and pour my spaghetti in and cover with sauce.  Cover well with foil and freeze (I've frozen for over a month before and it was fine).


To cook: thaw completely.  Cook on 350 for 30 minutes or until heated throughout.  Serve with bread and salad.  Sorry, no picture.  I thought I had one on my computer, but I can't find it.


Meatloaf  (this will make about 24 muffins or 2 loaf pans, I always half it if it is just for us)

3 pounds ground beef
1/2 cup dry bread crumbs
3-1/2 cups milk
1 cup minced onion
2 eggs
2 tablespoons salt
2 tablespoons Worcestershire sauce
1/4 tsp ground pepper
Combine all ingredients and pour into a greased muffin tin.  Cover with foil and freeze for up to three months. (I didn't make quite enough for 12 this time, oops)
To Cook: Thaw completely.  Cook on 350 for 20 minutes or until muffins are brown.


Hope this helps some of you who were wanting some new freezer meal ideas!  I'll have more next week!

Saturday, July 14, 2012

Saturday Morning In A Small Southern Town

For those of you who may not know, we live in a small town just south of Chattanooga, TN, in Northwest Georgia.  We almost put our house up for sale to move back to Chattanooga a few weeks ago, but we decided to stay.  We decided that we love our little town because it has that small town feel and only has around 3,000 people.  Chattanooga has had a large farmer's market every Sunday for about 5 years and I'm so excited that some of those vendors have come to Ringgold (including a friend of mine that was selling adorable handmade pillows that I totally want for my patio!).  It just started about 6 weeks ago and I haven't had time to go until today, so we got dressed and went downtown (about 2 miles from my house) to the market!   It is set up right in front of our courthouse and it was so fun to just walk around and get our produce for the week.   
At first a little toddler I know wasn't too thrilled to be there.  He wanted to be at home watching Disney Jr, but I was determined we were not going to spend all day in front of the TV!After we started walking, Nicholas loved it!  I couldn't even get him to go home.  I tried to go back to the car twice and each time he screamed "NO MAMA!", so we just walked around downtown and went into a few little shops and the coffee shop.  I'm definitely going back next week.  It was a good way to keep N from sitting in front of Saturday cartoons and vegging all morning, plus an affordable way to get fresh, local produce.

I ended up spending $11 on squash, zucchini, salsa, and blueberries (which I couldn't get a picture of because a certain toddler had already taken the bowl of them to eat!).  Definitely worth spending an hour of our time together this morning just the two of us!

Tuesday, July 10, 2012

Oh Twodles Invitation

I know everyone is tired of my party posts, but I wanted to write a post to rave about one of the two vendors I used for the party.  The only things I had someone else do for me were the invitations and the cake/cupcakes.  I know when I was trying to decide on an invitation I looked on several blogs for invitation ideas.  I knew what I wanted and I was having a hard time finding just the "right" thing.  I finally found an invitation I loved on Etsy at Amanda's Parties To Go.  I still cannot believe how awesome the service was from her shop!  I got my invitation and two different thank you note printables for $15 and the best part was the turnaround...TWELVE MINUTES!!!  I took my file to Office Depot and in 15 minutes, I had 50 5x7 invitations for $16!  I seriously have never loved an invitation as much as I loved how cute these turned out (and that includes my super expensive wedding invitations!).  If you want a great invitation in a hurry, go to Esty and check out Amanda's store here.  I have had so many compliments on them and I hope to order from Amanda again next year!

***This post was NOT compensated.  This was strictly based off my opinion and experience and I am in no way compensated for my post.

Monday, July 9, 2012

Oh Twodles...The Details

I LOVE, and I mean LOVE planning parties and crafting for them.  I actually purchased a Cricut after last year's party because I wanted to do it all myself this year and I'm so glad I did!  I started working on it at the end of April and really went into overdrive about 3 weeks before the party.  I knew exactly what I wanted and after browsing Pinterest and Etsy, I came up with the fine details.  

We had 2 "adult" food tables and 2 "kid" tables.  Here are the larger centerpieces for the adult tables.  The children's tables were just a little smaller, but the same thing.  I used a red bucket from Hobby Lobby, black crinkle paper, dowel rods and three styrofoam balls to make the body.  I hot glued the dowels to a styrofoam block at the bottom of the buckets.  The only advice I have is to make sure you use craft spray paint because I didn't realize that the paint would eat the styrofoam.  OOPS!             
We had a bubble station under a tent and it was a huge hit!!!  I found the Bubble Maker here.
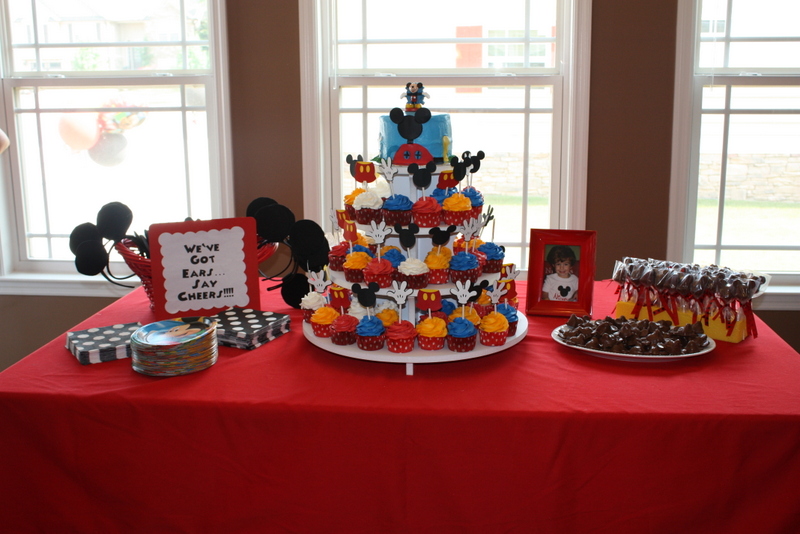
I saw a sign like this on several blogs and on etsy and had my dad make me one.  I cut the letters on my cricut and hotglued them on.  I had several comments on how cute it was.
The easiest craft I made for the party was this balloon wreath I saw on Pinterest.  It turned out so cute and only took about 45 minutes!  I'm going to do a tutorial post later this week on how to make one because I have had so many questions about it.
Friday night I made chocolate lollipops and candies to include on the cake table as a favor to bring home.  They turned out way too cute!!!

When I started looking for ears I wasn't happy with the quality of the ones I found at the party stores or online, so I decided to make my own.  I followed the tutorial here.  This was truly a labor of love that took me about 4 hours total.  I made 30 of them and they were not perfect, but turned out pretty cute regardless.
I decided this year that I didn't want to fool with having to cut a cake and serve it, but rather spend it mingling with my guests and enjoying the party.  I will say that I do not regret that decision at all!  We did a cupcake tower with 72 cupcakes and a 6 inch cake with a fondant clubhouse on top.  It was beyond precious!!!  We did half the cupcakes in funfetti and the other half in chocolate with red, yellow, blue, and white icing.  I say this all the time, but my cake girl, Becky is AWESOME!!!


I made the toppers myself using my Cricut and cardstock.  I was super happy with the way they turned out!  I made Mickey heads, pants, and hands.
We had red and yellow plates and napkins for the adults and Mickey plates for the kids.  I hotglued ribbon to the silverware buckets and drink dispensers for a little additional detail.
We had Mickey themed food...duh!  I bought Mickey nuggets from Costco for the kids.
We also had watermelon cut like Mickey heads, Pasta Salad in a Mickey head bowl, chips, and fruit salad.
Here is the entire food table.  My mom found the Mickey at Hobby Lobby back in March in the garden stuff!  I thought it was cute as a centerpiece!
What Mickey party would be complete without a Hot Dog, Hot Dog, Hot Diggity Dog, Hot Dog Bar?!
This was my drink table after the fact.  I forgot to take a picture before. :-(  I made a Oh Twodles banner and drink labels with my Cricut.  We also had these cups for the kids from Amazon.  They were a big hit!
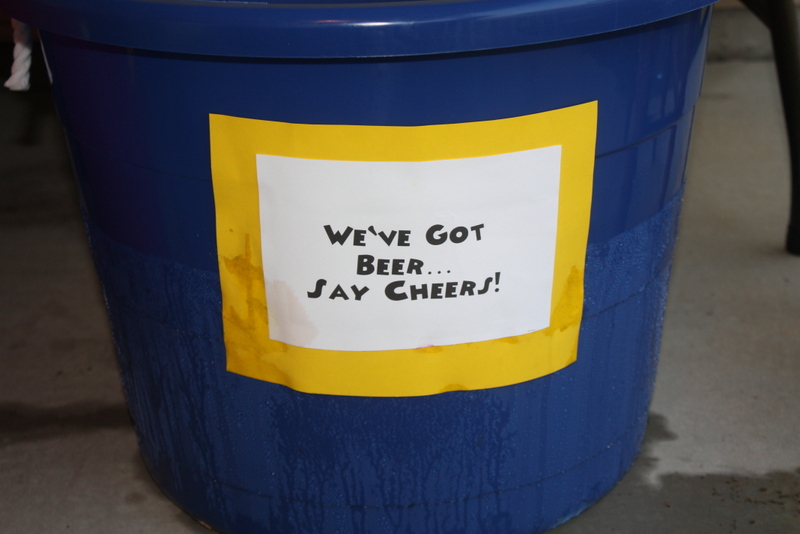
As always, we had a coke/sprite bucket and a beer bucket.  When I made my "We've Got Ears...Say Cheers" sign Michael joked I should make one that says "We've Got Beer...Say Cheers".  I thought it was cute, so I made one for the beer bucket too.  Haha!  So inappropriate, but funny.  Everyone thought it was cute and laughed about it.
I would like to give a huge shout out to Michael and my mom for all of their help!  I never could have pulled this off without all of their help!  Hope you enjoyed this little tour of the party details.  It was so fun and I loved planning it all.  I would LOVE to be able to party plan as a full time job, but unfortunately, we need benefits and a steady income, so that isn't possible.  I guess for now I'll just have to blow it out once a year for Nicholas' parties! :-)

And yes, I am already in planning/brainstorming mode for next year.  I am going to do a pirate party next year, complete with a treasure chest full of loot (for favors instead of doing bags).  If you follow me on pinterest, watch out, lots of pirate pins coming your way! :-)